Steps
Download the minimal freeGLUT library,
Extract the zip file,
Copy ‘include’ folder from freeglut to ‘include’ folder of your compiler,
Choose ‘Yes’ when explorer asks if you want to merge it into the already existing folder.
Copy ‘libfreeglut.a’ and ‘libfreeglut_static.a’ from ‘lib’ folder of freeglut to ‘lib’ folder of your compiler,
Download a sample OpenGL code for testing purpose,
Copy ‘freeglut.dll’ from ‘bin’ folder of freeglut to where the sample code is present,
Open the sample code in your VSCode,
Start terminal in VSCode and cd to the location where your sample code is present,
Run the following commands and enjoy!
g++ -o “moon.o” -c “moon.cpp”
g++ -L..\lib -o “moon.exe” “moon.o” -lfreeglut -lopengl32 -lglu32 -lwinmm -lgdi32
./moon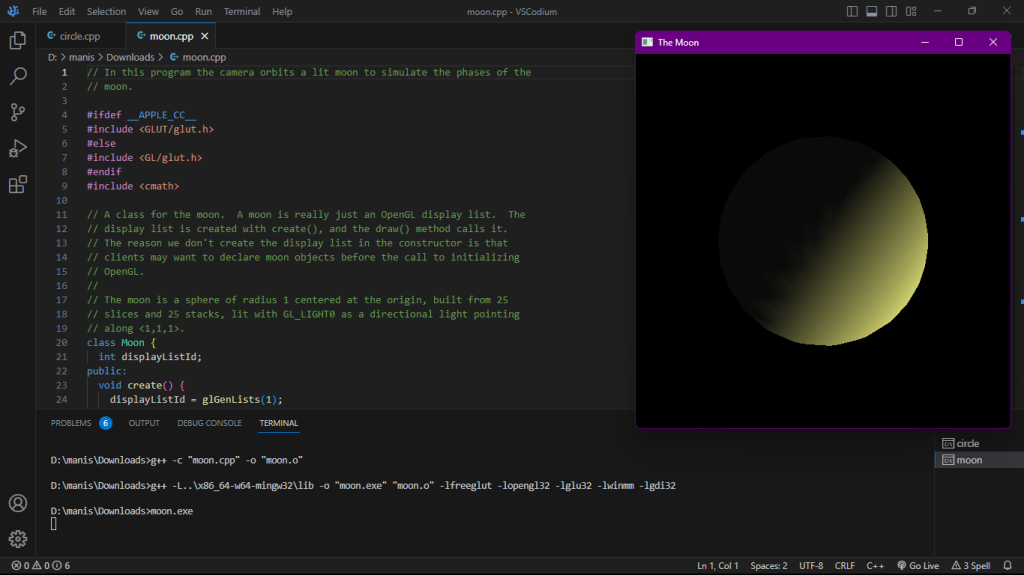
BTW, if you are using 64-bit GCC
Copy ‘include’ folder from freeglut to ‘x86_64-w64-mingw32\include’ folder of your compiler,
Accept the folder merge conflict,
Copy ‘libfreeglut.a’ and ‘libfreeglut_static.a’ from ‘lib\x64’ folder of freeglut to ‘x86_64-w64-mingw32\lib’ folder,
Instead of Step No. 8,
- Copy ‘freeglut.dll’ from ‘bin\x64’ folder of freeglut to the folder with sample code.
Instead of Step No. 11,
- Run the following commands,
g++ -c “moon.cpp” -o “moon.o”
g++ -L..\x86_64-w64-mingw32\lib -o “moon.exe” “moon.o” -lfreeglut -lopengl32 -lglu32 -lwinmm -lgdi32
./moon
Add VSCodium in Windows Context Menu